Friday, October 20, 2017

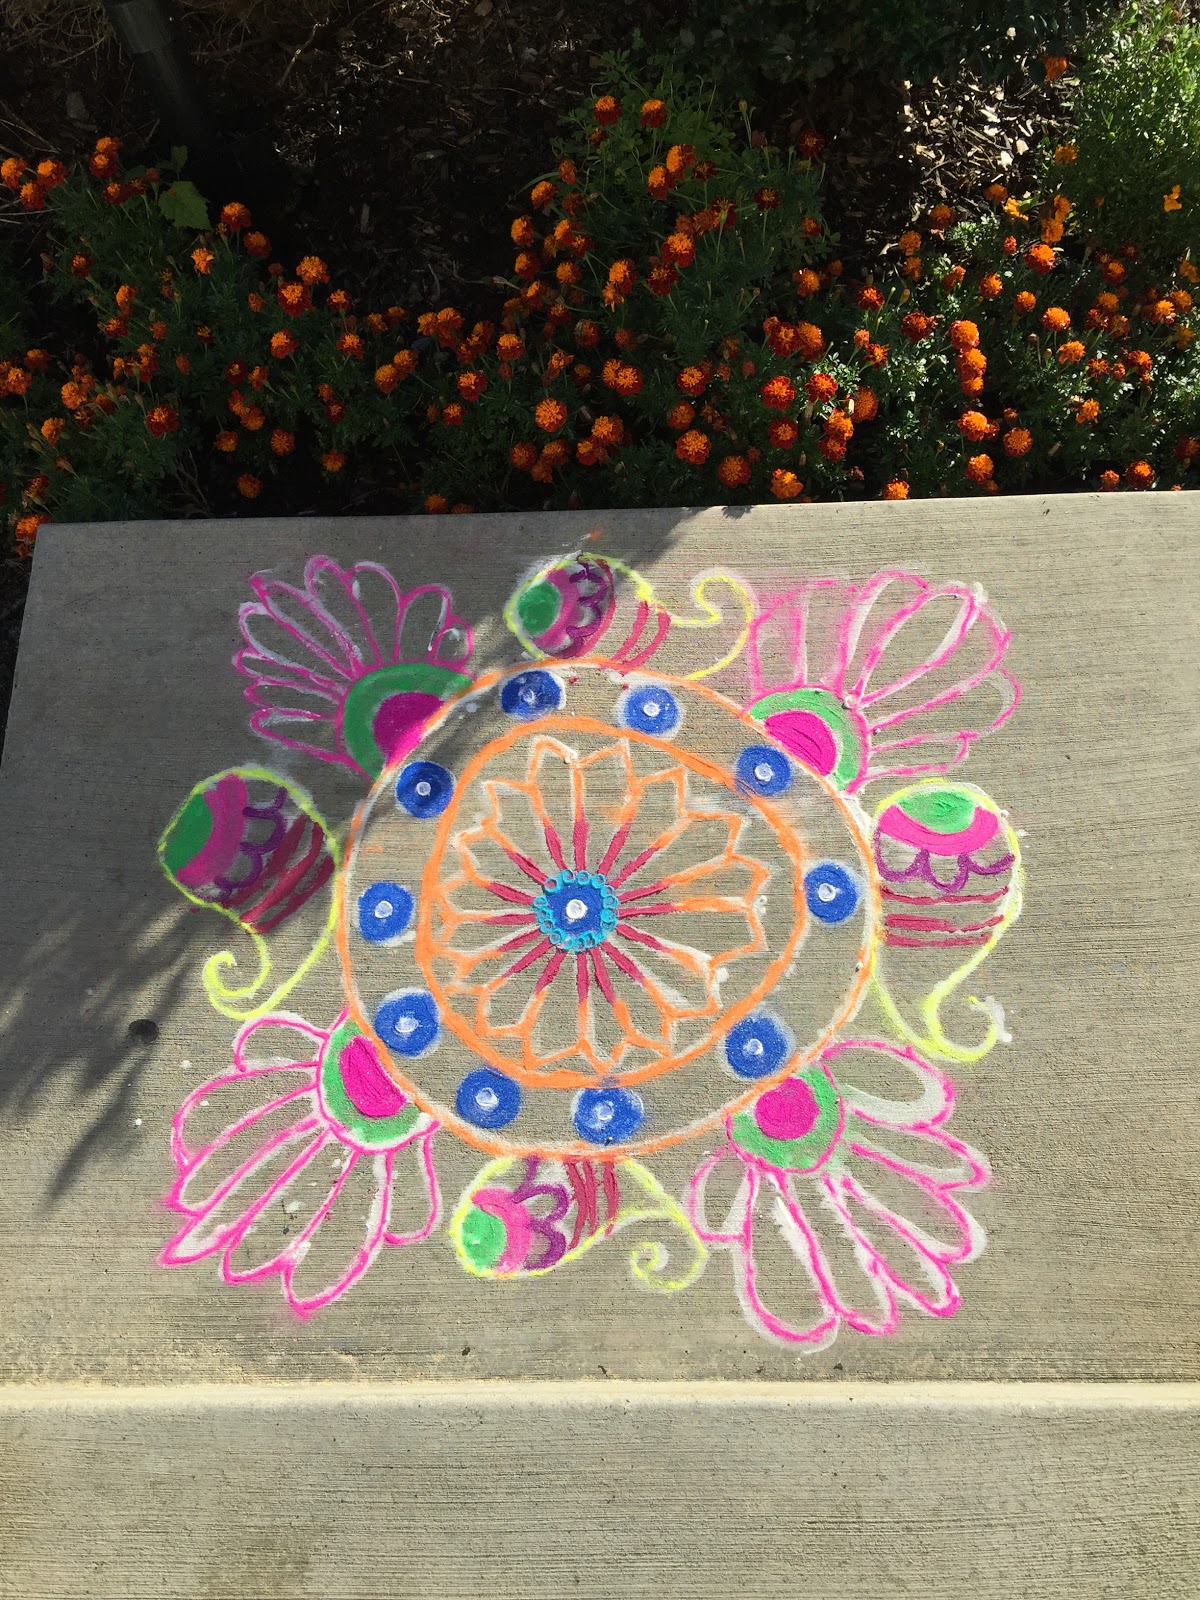
I Am Back!! Happy Diwali to all!!'

Hello Friends,

   I am back on the blog after a long time. Was so caught up with kids, job,
Different social sites. But now I am here again. Wishing you all a very happy
Diwali from my home to yours. May this diwali brings you good health
wealth and prosperity.


Monday, October 13, 2014

Cajun Finger Chips

Finger Chips, who doesn't love them. I remember my kids used to eat only chips whenever we used to  go out for dinner.  Have tried it number of times with variations. This one is with Cajun spice with a hint of balsamic vinegar. Oven baked Cajun spices.
Cajun flavoured FingerChips 
Ingredient

 3 Potatoes, cut lengthwise about half inch sticks
1 tbsp extra virgin olive oil
1 tsp Cajun spices, balsamic vinegar
1/2 tsp cumin powder and sea salt


Tuesday, September 3, 2013

Egg Potato Bruschetta with 2 cheese

Bruschetta is originally an Italian recipe usually cooked with tomatoes, basil and garlic. It is pronounced as “brusketta”. You can do Bruschetta with various ingredients whichever is available in your fridge or pantry. It is a summer dish but can be cooked throughout the year.

As per Wiki, it origin dates to 15th century which consists of grilled bread rubbed with garlic and topped with olive oil, salt and pepper with variations in toppings. Bruschetta is usually served as a snack or appetizer

"In Italy, bruschetta is often prepared using a brustolina grill. In the Abruzzo region of Italy a variation of bruschetta made with a salami called ventricina is served. Raw pork products and spices encased in pig bladder are aged and the paste spread on open slices of bread which are sometimes grilled. This was a way of salvaging bread that was going stale. In Tuscany it is called fettunta and it is usually served without toppings, especially in November, to taste the very first oil of the season"

Links:http://en.wikipedia.org/wiki/Bruschetta

Egg Potato Bruschetta with cheese


You can absolutely use anything as topping with tomatoes and cheese.
The dish here is a simple one with potatoes, tomatoes, 2 different kind of cheese.

Ingerdients:

1 Baguette  or ciabatta.
2 tbsp of olive oil
1 potates, cut into small cubes
1 tomatoes, roughly chopped
1 tsp of couscous
1 tsp of cumin powder
Sugar, salt n pepper
handful of mint leaves, you can use baby spinach or any other greens
1 egg beaten
mozarella & mexican cheese
1 tbsp of veg or olive oil


Preparing the topping.

In a small pan, heat the veg or olive oil. Put the chopped potatoes in it, some salt, Fry the potatoes for a minute or till it gets tender. Add half of chopped tomatoes and fry. Add the greens and mix well. Sprinkle the cumin powder, pepper, couscous and sugar to the mixture. Move the mixture to the end of the pan. Pour in the beaten egg and let it settle for a minute. Break the mould and mix with the potatoes and tomatoes. Th egg omelette broken in tiny pieces and mixed well with the potatoes, tomatoes and the green. Adjust the seasoning.

Method
Preheat the oven.
Slice the baguette into about a inch thick. Brush one side with olive oil and put in the oil side up in the grill for a 4-5 minute. Remove and let it cool.

Once cool, lay the grilled side up on a lined baking tray. Scoop the prepared topping generously on each slide. Add tomatoes on top of it. Put the broken mozzarella slices on top and two or three pieces of Mexican cheese.
Put it back in oven for 8-10 minutes till the cheese becomes crispy.
Bruschetta in Oven

Bruschetta


Serve with Soup or can be nibbled just like that.

Happy Cooking!

Kingfish Curry...Surmai


Surmai Jhol


Ingredients:

4-5 Kingfish pieces, nicely cleaned, scaled and cut into flat pieces. You can request the Fish seller to cut it into big Indian pieces. Believe me they know the difference between Indian, Bangladeshi and Pakistani pieces.
2 small onions, finely chopped
1 big tomato chopped
2 green chillies, split across
handful of chopped coriander leaves
1 big heapful tbsp of Ginger garlic paste
1 tbsp mustard paste. I use dijon mustard, it works wonder.
1 tbsp tamarind paste
1 tsp of Paanchphoron (mix of five spices- cumin, fenugreek, brown mustard seeds, fennel and nigella seeds)
Generous pinch of Jeera (Cumin) seeds, Mustard seeds, a bay leaf, 2 dried red chillies
1 tsp each of Cumin Powder, Coriander powder, Amchoor(Dried Mango) powder & sugar
1 tbsp of Garam masala
2 tbsp of veg oil
2 tbsp of mustard oil for frying
2 tbsp of turmeric powder
salt & water

Method

In a flat big pan, put the mustard oil to heat up. Nice hot.
Rub some turmeric and salt to the fish pieces and fry the fish for more than a minute on each side and keep aside.
Put the wok on gas and dry roast the mustard and cumin seeds and red chillies for a minute till you get the aroma. Remove from the wok.
In the same wok, pour in the veg oil(you can used mustard oil too), add the bay leaf and roasted cumin and mustard seeds with red chillies and paanchphoron. When they split, add the onions and fry it till it is soft. You can sprinkle some salt to fasten the process.
Add the tomatoes and keep frying, stirring regularly.
While our onion and tomatoes are frying in the pan, you can start with the mustard paste mixture.
In a bowl, add the mustard paste, remaining turmeric powder and tamarind paste. Pour in hot water and give it a whisk. this will also reduce the bitterness of the mustard paste.
Back to the wok, add the green chillies, ginger garlic paste and fry for another minute or two.
Add the cumin, coriander powder, salt, sugar and amchoor powder and mix well with the onion and tomato mixture. Add the garam masala and fry the mixture till it leaves oil.
Add the mustard, tamarind paste we earlier made to the mixture and stir. Pour in water as required for the gravy. Check the seasoning and adjust.


Now slowly add the fried fish to the wok and let it simmer for good 10 minutes for the fish to absorb all the flavour. once done, transfer it to the serving dish and sprinkle some coriander leaves. You can serve steam rice, pulao or plain chappati/roti.

Happy Cooking!


Tips:
1.  For frying fish, heat up the oil to a very hot temp to avoid the fish from sticking to the bottom of the pan.
2. Don't overcrowd the pan while frying fish pieces.
3. While frying the onions for curry, to fasten the process, sprinkle some salt.
4, While using mustard for any fish recipe, if the mustard paste is dissolved in water, it reduces the bitterness of the mustard.


Monday, August 12, 2013

Sabu Dana Khichadi...Sago stir fried

In India, the month of 'Shravan' is a very auspicious month. People travel to famous places to worship God Shiva  and offer Jal Abhishek on Shiv Lingam specially on Mondays to get his blessings.
From childhood I have been keeping Fast on this day to get a nice husband. It is a well known faith back in India that if girls, women do this fast on Mondays and offer 'Jal' Water to God Shiva, they will get good husband.
I have continued the ritual even after my marriage to thank Shiva for giving me hubby which is perfect for me in all sense. :)

So the recipe for today is one of the famous Maharashtrian dish which is normally consumed by those who had observe a Fast on any religious day.

This recipe- Sabodana Khichadi is very yummy and can go as a breakfast item as well, fast or no fast.


Ingredients:

250 gms Sabodana soaked up in water for about 2-3 hours. Sabodana is called Sago in english and is available in almost all super markets nowadays.
2 potatoes, cut into 1 inch or smaller cubes and boiled till soft
Handful of Shengdana(GroundNut)
2 Green Chilies
Salt to Taste
1 tsp Jeera/Cumin seeds
1 tsp of powdered Cumin
2 tbsp Oil
Handful of chopped coriander leaves

Method

In a pan, heat oil. Add the ground nuts/shengdana. Fry for about a minute. Add the Cumin seeds, Green chillies and boiled potatoes. Stir it.  Let it fry for about 4-5 minutes. Add the soaked sabodana, salt and cumin powder. Give it a good mix. Stir fry it for another 3-4 minutes stirring it regularly as the sabodana tend to stick to the pan. Taste and adjust the seasoning. Mix the coriander leaves and serve hot.
Quick and Easy to make and super yummy to eat.


Happy Cooking!!!

Wednesday, August 7, 2013

Prawn Salad with baby potatoes


Shrimp/Prawn Sesame Salad

Hello Friends, it’s been another Salad dinner night (J yes, we are still managing to have just Salad for dinner). So I decided to get something more than just vegetables.But just three nights down, I am already craving for nice complete meal warm and hot.

Prawn is something which you can throw in the vegetables and it works brilliant.
Frozen prawn is easily available in almost every supermarket and is like secret ingredient for me as they are peeled, cleaned and cooked ones. Oh life is so easy with the frozen prawns. Whenever I am short of ideas for dinner or lunch, I cook something or other with prawns. Quick and Easy!

I served the Prawn Salad with warm baby potatoes. So it is a mix. Cold and Warm!


Ingredients
250 grams –small prawns/shrimps, peeled, washed and cooked.
4-5 small radish-cut into 4 halves
1 small beetroot- cut into 1 inch cubes
2 tomatoes- sliced into big chunks
1 Medium Onion sliced roughly
Baby Potatoes, washed and skin on
1 celery stick sliced
Bunch of basil leaves, I used Greek basil as it is growing in my kitchen window
A bunch of coriander leaves chopped finely
Spring onions few twigs chopped roughly
2 tbsp of butter

Dressing

Juice of 1 lime
1 tsp white sesame seed
2 tbsp olive oil
2 tbsp sesame oil
Salt and pepper to taste

Process


1.

Pre heat your Oven.
2.

Put a deep bottom pan with water on full high and let the water come to boil.
3.

Put the baby potatoes and cover with a lid and let it boil.
4.

When they are soft enough, drain the water.
5.

In a bowl, put the potatoes, butter, salt & pepper, a pinch of coriander leaves and mix it well.
6.

Put the potatoes in the oven for about 15 minutes at 250 degrees Celsius.
7.

Meanwhile heat 2 tbsp sesame oil and add the sesame seeds to it.
8.

Don’t let it go dark and add the prawns to it. Sprinkle some salt and pepper to it and stir it so the prawns are coated well.
9.

Fry the prawns for 2-3 minutes and set aside.
10.

On another deep bottom pan, boiled the celery, radish and beetroot for 3-4 minutes. They should be chunk.
11.

When done, drain.
12.

Take a big bowl, add the vegetables, prawns and give it a little mix.
13.

Prepare the dressing with the remaining sesame. Add the coriander leaves in it and give it a good whisk. Adjust the seasoning if needed.
14.

Dress the salad with the fresh dressing and we are done with the salad.
15.

The potatoes done, nicely crisp on outer and soft inside. Serve them hot. If needed sprinkle some sea salt and pepper and straight on the table.


Happy Cooking!!!


Friday, August 2, 2013

Chickpea salad with baby spinach and hint of mint...summer special

Hello Friends...
It is summer time in Britain....and it is lovely with some showers and clouds...
Summers and Salads...they go together.....
We ( my hubby and I) decided to have salads as dinner for this entire week...Different kinds and varieties...so yes, this inspired me to cook up some ideas and serve him as supper/dinner.
Started with a very simple salad with load of greens and chickpea...sprouted. Turned out very nice with the simple dressing of lime juice and olive oil...'Heaven'....my hubby said while whisking the dressing imitating Jamie Oliver :). There is something with Jamie and olive oil...well we will talk about that some other day....now is the simple veg chickpea salad with baby spinach.

Chickpea Salad with plums and hint of mint


Ingredients:
Chickpea sprouted for a two days or more more than a cup.
Fresh baby spinach a handful
2 big chunky carrots grated
1 cucumber grated
3 red plums chopped
7-8 cherry tomatoes sliced in 4 pieces
1 celery stick sliced
1 inch of fresh ginger grated
Half of a baby cucumber chopped
One big red onion sliced thinly
Handful of mint leaves chopped
Handful of coriander leaves
Handful of Greek basil

For the dressing

2-3tbsp of Olive Oil
Juice of 2 limes
1tbsp of sea salt
Fresh grind pepper

Honey to drizzle
Salt to adjust.


Process

In a big salad bowl, mix all the veggies except the spinach leaves.
Add salt to it and give it a good mix. The dressing should be properly whisked. Adjust the taste and add more lime juice or olive oil if required. Pour it in the salad bowl and give it a good mix and toss...you can do that with clean hands too..:)...

On table

On a plate, make a bed with handful of baby spinach leaves.
On the top, serve the salad anD spread a little. Spoon in the extra juice at the bottom of the bowl over the salad. Drizzle honey on top.


The ginger adds a lot of flavour to the salad and so does the mint. Just wonderful. The sweetness from the plums and the crunchiness of the carrots are amazing.
Many do not like celery in veg salads, you can avoid in that case.


One can add other vegetables too...like radish, baby courgettes, tomatoes, boiled baby potatoes and many others...

So enjoy salads and summers with us...in Haldarskitchen...
Happy Cooking!!!


Wednesday, July 17, 2013

Monday, July 15, 2013

Chicken Nihari...A Royal Delicacy from Lucknow

Traditionally ‘Nihari’ was cooked with mutton or beef in the royal palaces of Lucknow as breakfast curry. The name comes from the Arabic word ‘Nahar’ which means morning. The Nawabs of Lucknow liked the mutton nihari with laccha parathas as breakfast.

It is very spicy and delicious dish with lots of whole spices grinded freshly without roasting them.

To suit me and my family’s palate, I cooked Nihari using boneless chicken and a little less spicy for my little one. And yes added few ingredients to enhance and make up for the spicy ness.
One very important fact I got from one of the site is this recipe is also a great homemade remedy for common cold and fever.  So here is my second royal dish straight from the streets of lucknow(now adays).

Chicken Nihari


Ingredients

Chicken- 2 big breast pieces around 1kg, cut into cubes/pieces)
 Onions- 3 (sliced)
Ginger-garlic paste- 2tsp
Red chilli powder- 1tsp
Turmeric powder- 1tsp
Coriander powder- 1tsp
Coriander leaves- 2tbsp (chopped)
Bay leaf- 1
Cinnamon stick- 1
Whole wheat flour- 2tbsp
Salt- as per taste
Sugar- 1tbsp (I am a Bengali, can’t miss sugar in non-veg dishes)
Dry Mango powder (Amchoor powder)- 1tbsp
Ghee- 1tbsp
Oil- 4tbsp
Water- 2 or more cups(it should be thick gravy)

For ‘Nihari’ Masala

Fennel seeds- 2tbsp
Cumin seeds- 2tbsp
Green cardamoms- 4
Black cardamom- 1
Cloves- 8
Black peppercorns- 15
Nutmeg- 1tsp
Cinnamon stick- 1
Bay leaf- 1
Dry ginger powder- 1tsp

Process

Grind all the items listed under 'Nihari Masala' into a fine powder in a mixer and keep it aside.  You can simply store the excess masala in a container for later use.

Clean and wash the chicken pieces thoroughly. Place them on a tissue and soak the water.
 Heat two tablespoon of oil in a pan or a kadhai and put the half batch of chicken pieces. Sprinkle a little turmeric powder for a brilliant colour. Fry the chicken pieces till they are golden. Repeat the same process for the second batch.
Once they are fried, take them out and keep aside. You may need to use a flat shaped spatula as because of the turmeric powder they might stick to the pan.

In the same pan, now add 2 tbsp oil, bay leaf, cinnamon stick and add the sliced onions. Fry them on medium heat till they are golden. Add ginger-garlic paste, turmeric powder, coriander powder, half teaspoon of red chilli powder, two teaspoon of the nihari masala prepared earlier. The masala will be very dry in the pan/kadhai. Add half a cup of water and cook for another 4 minutes. Now add the fried chicken pieces to it and cook for 5 minutes. Add salt and a cup of water to the kadhai and mix well.

While the chicken is cooking in the pan, prepared a batter with whole wheat flour and water with a smooth flowing consistency and pour it in the kadhai. Give it a good mix with the spatula. Check and adjust the taste.
 Let the chicken boil in the gravy and absorb all the spices. You may need to cover the pan/kadhai and let it cook for about 15 minutes on very a low flame. And don’t forget to stir it at regular intervals with the spatula as because of the flour, the gravy may stick to the bottom. Add the amchoor powder to the kadhai and mix well.
 After 15 minutes, remove the lid and check whether the chicken is well cooked or not. Check the taste again. If all good, switch off the gas and keep the lid on.

Tadka

Heat the ghee in a tadka pan and add half teaspoon of red chilli powder and one teaspoon of the remaining nihari masala. Fry for few seconds and add it to the cooked chicken curry.
You can garnish the chicken with chopped coriander leaves. Serve it warm with Rice or Nans or roomali rotis or even plain rotis.

Happy Cooking!!!


Thursday, July 11, 2013

Fried eggs with fried-rice

 Hello friends, Apologies I am posting after a long time....was trying to settle with the new job, school runs and London life. But not to worry I am back. I have been cooking and experimenting in my kitchen all throughout but was not able to sit and jot the recipe in my blogpost and upload the pics. Days passed and now it's finally summer in UK. So here I am with whole lot of recipes awaiting to be posted and share with world.

As I said, my days are busier now, so I am always looking for quick and easy recipes specially in the weekdays.
 This one is an easy, simple dish takes just minutes to prepare and is a complete meal. The ingredients used here are readily available in any household. The recipe is from a book called 'Easy 30 minute meals' quick and easy recipes for busy people....I did some alteration to the recipe and it turned out perfectly fine.
So here it goes...

Ingredients

1 cup basmati rice washed ( leftover cooked rice will also do)
2/3 cup vegetable oil ( recipe says ground nut oil)
4 eggs 
2 garlic cloves, peeled and crushed 
4 spring onions sliced finely
6 to 7 fresh baby beans...if they are not baby beans you may need to blanch and fry them before adding to the rice.
1 scallions/ small onion sliced 
1 teaspoon sesame oil
1-2 tablespoon soy sauce depending on dark or light...I used dark and 2tbs
Freshly crushed pepper as per taste (recipe says a pinch of white paper)
2 tablespoon  of oyster sauce (I did not used)
Salt as per taste
2 fresh red chillies deseeded and finely chopped
a handful of fresh coriander leaves
You can serve tomato or chilli sauce of your choice.


Process

The process is very easy it is just like our fried rice with fried egg....with a Chinese touch

Cook the rice according to the package instruction(or by your experience).

Drain, rinse, and set aside until needed. You can also use a equal amount of leftover from the previous day.

Heat the oil in small deep wok over a high heat. The oil should be hot enough.

Crack 2 eggs into a dish and gently slide them in the hot oil.  The oil is hot enough and it may splutter a little so stand back and be careful.
Cook for 2 minutes until the whites are set but the yolks are still soft and oozy. If you do not like a soft centre you can cook it further but believe me the best part of a fried egg is the oozy centre.
Remove them from the pan and keep aside. Fry the other two similarly and set aside until needed.

Reuse 2 tablespoon of the remaining oil in a big wok or large saucepan. You can use the left over oil for preparing your dinner or next day lunch time meal.


Heat the oil and add garlic. Cook until its starts changing colour, add the cooked rice and half or more of your spring onions, all the chopped beans and scallions. Stir fry briskly for 4-5 minutes, add the sesame oil, soy sauce and salt to it. Give it a good stir. You can also sprinkle some fresh pepper now. Transfer it into a bowl and placed he fried egg on top. Sprinkle some salt n pepper on it and the remaining spring onions and the red chillies. Sprinkle some fresh coriander leaves and serve with tomato or chilli sauce of your choice.


Your fried rice with egg is ready....


Happy Cooking!!! 

Thursday, December 27, 2012

Merry Christmas!!!


                                         Merry Christmas!!!


Thursday, February 16, 2012

Indian Spices....a very useful info

Indian Spices....a very useful info

                                                          Courtesy Yahoo

Please click on the above link...I found a very nice and informative article about the Indian Spices. We all know about there medicinal properties and use them in our daily cooking. But I found it very  tempting to post it here in my blog. Hope you all like it....
Happy Cooking!!!

Friday, February 10, 2012

Plum Tomato Chutney


Plum Tomato Chutney


Tomato chutney is a must to have delicacy during any occasions in a Bengali household in India.  It is extremely popular in Bengal as well as in other places like Andhra though the preparations is little different in different places. In Bengal, it is sweet chutney, can have different variations as per the season but a must when there are guest for lunches or even for Sunday lunch. It is all time favourite item in the Pujo Bhog for Durga Pujo, Lakshmi Pujo or Kali Pujo along with Kichudi.
Though this chutney can be cooked with different ingredients such as Apples, Dates, Aam shotto (Sweet Mango sheets), sultanas, etc etc and served as an accompaniment with rice, Nan, chapattis, fried rice or Pulao. Here is my recipe of Tomatoes cooked with plum….very easy and a quick one.


Ingredients:
2 Big juicy Tomatoes- chopped
4 Juicy Plums- seeded and chopped
2 green chillies chopped finely, if you have a kid at home than you can take the seeds out or just could put a slit length wise
4 tbsp of grated fresh root ginger
½ tsp lemon zest
Juice of 1 lemon
2 Bay leaves
A pinch of salt (black salt tastes even better)
6-7 tbsp of soft brown sugar / half cup of jaggery,  depending on how sweet you want it to be. I used half cup of jaggery plus 2 tbsp of soft brown sugar. It gives a caramelised taste to it. If you do not have both of them in your pantry, don’t worry. You can use normal white sugar by all means.
1 tsp of plain vinegar (optional)
A pinch of freshly grounded black pepper
2 tsp vegetable oil.
A pinch of mustard seeds (optional). Well, it is a must at my mum’s and in laws place but I haven’t used any.


Direction:
Heat the oil in a deep bottom sauce pan.  
Add the bay leaves and grated ginger and green chillies to it and stir. Also the mustard seeds if you want them.
 After few seconds, add the chopped tomatoes and plums and give it a good mix and cover with a lid.
Take out the lid after around 4-5 minutes and stir well. By this time the tomatoes and plums will start melting and a lot of liquid will be released.
Keep on stirring on low flame.  It will help in melting the tomatoes quickly.
Sprinkle the salt and the lemon zest now, mix it. You can see the sauce sort of thing by now. This is the chutney forming.
Pour in the lemon juice and vinegar. You can add the sugar/jaggery now. Give it a good mix. Cover the lid for another 2-3 minutes.
Take out the lid, grind the black pepper on it and stir.  Switch the heat off now.
Check and adjust the seasoning. The tanginess from the lemon and vinegar and the sweet from the jaggery and sugar give a nice flavour to the chutney. And the salt really brings out the flavour.
You can store this chutney for 2-3 days in a jar.
Now the variations:
With Sweet Mango slices- It will give mango tanginess plus an amazing colour to it.
With Dates: Richer and heavy
With sultanas:  Loved by children and elders a lot.
With Apples: it is more in mass and sweet too
More towards British version
You can add strawberries, raspberries, cranberries and cherries too….not tried yet but they are surely in my list. Let me know if you try one.

Happy Cooking!!!


Monday, February 6, 2012

Chocolate Hazelnut Fudge Pudding


Imagine, sweet chocolaty fudge melting down in the mouth, one bite, you get a rich flavour of coffee and chocolate, second bite, you get a nutty crunch of almonds and hazelnuts and third the droplets of the golden syrup just stick to your mouth. Yummy na…J I got the same feeling when I tried out this recipe of vegan chocolate cake. But again it’s me, I need to add some me in all the recipes I try. So I added this very useful chocolate hazelnut spread, this truly yummy golden syrup and lots of nuts and from a cake recipe, I ended up in creating a very rich and tasty pudding. My first ever vegan recipe…. Chocolate Hazelnut Fudge Pudding...


Ingredients:
  • 1-1/2 cups all purpose flour
  • 1 cup powdered sugar
  • 1 tsp baking soda
  • 1 tbsp coffee powder
  • 1/2 tsp salt
  • 3 tbsp Chocolate  Hazelnut spread
  • 1/3 cup vegetable oil
  • 1 tbsp vinegar
  • 1 tsp vanilla essence
  • 1 cup cold water
  • Roasted almonds and hazelnuts, chopped roughly
  • 1 tbsp Simple golden syrup for drizzling
  • 1 tsp icing sugar
:
Sift the dry ingredients in a large bowl through a sieve to avoid the lumps and mix them well.
In a deep vessel, with a little vegetable oil, mix the chocolate hazelnut spread and put on stove. Keep on stirring till you get a smooth consistency.
Mix the other wet ingredients to it and stir well.
To avoid any lumping, add the wet ingredients to the dry ones, slowly and in small amounts. Give it a gentle mix.
Grease and flour the baking tin.
Pour the mixture into the tin.
Pat and shake the tin lightly on the counter to get rid of any bubbles in the mixture.
Preheat the oven. Place the tin in the oven and bake it for about 30 minutes at 200 Degree Celsius for about 30 minutes or until the pudding is soft to touch and bounce back.
 A tooth pick inserted in the centre should come out clean.
Cool it for about 10 minutes.
To take the pudding out, invert the tin on the serving plate and gently tap the tin.
It will be a little sticky at this time.

Roasting Almonds and Hazelnuts: Roast the almonds and hazelnuts on a pan for 3-4 minutes and chop roughly. You can use other nuts such as walnut and pistachios too.

For the decoration:
Sprinkle the roasted nuts generously on the pudding.  Sprinkle the icing sugar on it and drizzle some golden syrup.
Some cherries on top looks very pretty too.


Tips: If the baking time is increased from 30 minutes to 45 minutes, it can come out as a cake. Though the top will be dry and hard, just slice that out and cut the rest in pieces and enjoy.

Happy Cooking!!!


Thursday, January 26, 2012

Julienne salad with pea nuts and sesame seeds


A little fact:
Roman introduced the salad preparation to the world. They use to call it “herba salata”. The word herba referred to greens and the word salata referred to salad.  The greens were served raw with vinegar, oil and little salt. Very healthy. Over time, the salad preparation has changed tremendously. The simple dish took on variety of color, texture, flavour and aroma with the use of different vinegars and ingredients, raw or cooked. 

I love eating salads. This very simple and satisfying salad with one of the simplest dressing is my all time favourite. Reasons- One, quick and easy to make, two the leftovers can be easily used as a filling for sandwiches or wraps, the next morning. Third if you have a little time, you can transform this simple salad gorgeous by adding grilled chicken stripes or lightly fried prawns to it…

Ingredients:
1 English cucumber peeled
1 Carrot peeled
1 medium onion
1 hand full of rocket leaves mixed with baby leaf

Hand full of roasted peanuts with skin
2 tsp roasted sesame oil.
Pan roast the peanuts and sesame seeds.

Dressing: Ratio 3 parts of oil to 1 part of acid
3 tbsp of Extra Virgin Olive oil
1 Tbsp of lemon juice +1/2 tsp of Vinegar
1tsp of salt
1tbsp of brown sugar
A pinch of freshly ground black pepper
This is a very simple dressing. A lot of variation can be done.  
For example, Mustard paste can be added with the above dressing to give it a little heat.


Directions:
Pan roast the peanuts and sesame seeds.
Cut all the veggies except the leaves into long thin strips. Mix them with leaves.
 Mix all the dressing ingredients in a bowl and give it a good whisk. 
Check and adjust the seasoning, if needed add a little salt or vinegar.  
Pour the dressing and the roasted nuts over the julienne cucumber, carrots, onion and rocket and baby leaves and mix well. And the salad is done and ready to go on the table.

P.S Left over salad can be used for baguette filling or making sandwich.
Happy Cooking!!!

Tuesday, January 24, 2012

Lemon Garlic Chicken Curry


On a cold winter night, chicken curry and paratha is a hit in my home. Chicken is my all time favourite and I can cook and eat chicken at any time of day. 
My recipe of sweet and tangy chicken is a very quick one and a very yummy one too. 


Ingredients:
1 Baby Chicken cut into 5-6 pieces
2 small Onions chopped finely
1 can of chopped tomatoes
8 cloves garlic minced
2 tsp of Ginger grated
2 green chillies chopped finely, (You can deseed the chillies.)
Veg Oil for frying about 3-4 tbsp
A knob of butter
Juice of 1/2 lemon
2 Caps of normal Vinegar about 2 tsp
1 tsp of dried rosemary herbs
1 inch cinnamon stick
1 Pinch of cumin seeds
2 tsp of cumin powder
2 tsp of coriander powder
2 tbsp of sugar
1/2 tsp of freshly grounded pepper
Parsley for garnishing

Salt as per taste, some for marinating
1/2 tsp turmeric powder for marinating
Water 1 to 1/2 cup depends on the desired gravy


Marinating the Chicken
Apply turmeric powder and salt to the chicken. Rub well and keep it aside. 5-10 minutes will do just fine.

Directions
Heat the oil in the pot.  Drop in the butter.  Add the dried rosemary, cinnamon and cumin seeds to it. Quickly add the ginger and garlic to it. Keep on low flame so that the garlic does not burn. 
Add the green chillies and chopped onions to the pot. Stir well.
Add the salt to the pot and give it a good mix. Go slow on the salt as we have marinated the chicken with salt already. The salt here will help us in cooking the onions much faster.
Cover the pot and stir in between for 2 minutes.
Tuck in the chicken pieces and mix it well with the onions and garlic and again cover.
Now, add the sugar, pepper, and the cumin and coriander powder. Mix well.
Add the can of chopped tomatoes to the pot and give it a good mix.
Pour in the lemon juice and vinegar. Check and adjust the seasoning.
Mix everything well and pour the water, cover and let it simmers for another 5 minutes or so.


Since it’s a baby chicken it will be cooked in few minutes. And it will be Sweet and sour, tangy in taste. Garnish it with finely chopped parsley and serve with rice, chapattis, paratha...your wish :).
Happy Cooking!!!